Menu Builder
Who can use this feature
Site Admin, Channel Admin
Supported features: User Pages
Introduction
The Vidflex™ Menu Builder is designed to display clear, consistent and descriptive information on the header and footer, encouraging your audience to explore the platform to it's full capacity. Use the Menu Builder as an effective way to categorize your content assisting your audience to quickly and accurately locate content on a particular page.
This overview provides a video and written explanation of the Vidflex™ Menu Builder, how to configure Menu Items (Header/Footer) and best practices to make your platform easy to navigate.
Learn more about the other elements in the header Logo's, Troubleshooting, Multi-Language.
Video Tutorial
Watch the video below to learn how to add new menu items to the header and footer of your platform and configure them.
Opening the Menu Builder
On the left-hand side menu under Global Settings, click Menu.

Adding a Menu Item
The Header is selected by default. Select one of the Footer menus if you want to edit the footer instead.

- Header: can use single menu items or a group with nested menu items
Recommended for navigating internal pages and external links

- Footer (Link Groups): only uses a group with nested menu items
Recommended for Social Media links

- Footer (Horizontal): can only use single menu items
Recommended for Terms of Use, Contact Us pages


Click on the +Menu Item button to start creating.
Menu Item Types
All menus use the same 3 types of menu items, Page, URL, and Group. Use the table below to click on a menu item type to learn more about it.
Page
Add a user page from the platform as a menu item as a standalone link or nested under a group. Ensure the state of the user page is enabled in order to find and select it here.

URL
A internal or external link which can be added on its own or under a Group. You must include the 'https://' or 'http://' part at the beginning of the URL when adding it to the URL field.

Group
Organize multiple links or pages to create a Group. On the frontend it will appear as a drop-down list on the header or a list of links on the footer. A Group may contain links to user pages and URLs.

Each menu item is labeled on the right side, so you can quickly identify whether it’s a group, page, or URL.

Adding a Page
Before you begin: the desired page must first be enabled in User Pages before it can be selected here.
- Click the +Menu Item button
- Select Page from the Type drop-down list:
- In the Label text field add a Label/Name
- Click Reset, if needed, to start over
- Check the Open in New Window box for the link to open in a new browser tab when selected. The checkbox is deselected by default.
- Select the Page
- If you have more than one Channel, select which channel to the page you wish to appear in the drop-down menu.
- In the Page drop-down menu, choose the page which you want the link to take the viewer to.
- Click Save
- Back on the main menu dashboard, click Save to activate new changes
Advanced Query Parameters (optional)
You can pre-determine filtered content on a page by using Advanced Query Parameter field. Enter one of the desired parameters below in the Advanced Query Parameters text field. This is supported on the Search page, Gallery Page Widget, and Sports Schedule user page.
- Search Page example: search?keyword=test
- (replace 'test' with your search word)
- Gallery Page example: categories=attribute_group~atrribute-name,attribute_group~atrribute-name
- Replace 'attribute_group' with your attribute group name. If it has two words or more add the underscore '_' between each word.
- Replace 'attribute-name' with a nested attribute from your attribute group used above. If it has two words or more add the underscore '_' between each word.
- Here's a real example of what it looks like from one of our customer platforms: categories=team_canada~national_womens_under_18_team,team_canada~national_womens_development_team
- Sports Schedule Page example: sport=volleyball_mens
- This requires the Sports Management feature to be activated on your platform. Contact Sales to learn more.
Adding a URL
- Click the +Menu Item button
- Select URL from the Type drop-down list
- In the Label text field add a Label/Name
- Click Reset, if needed, to start over
- Check the Open in New Window box for the link to open in a new browser tab when selected. The checkbox is deselected by default.
- Enter the full URL of the website
- Always enter the full URL, when adding a link to an internal page on your platform.
- Remember to include the 'https' or 'http' part at the beginning of the URL
- Click Save
- Back on the main Menu dashboard, click Save to activate new changes
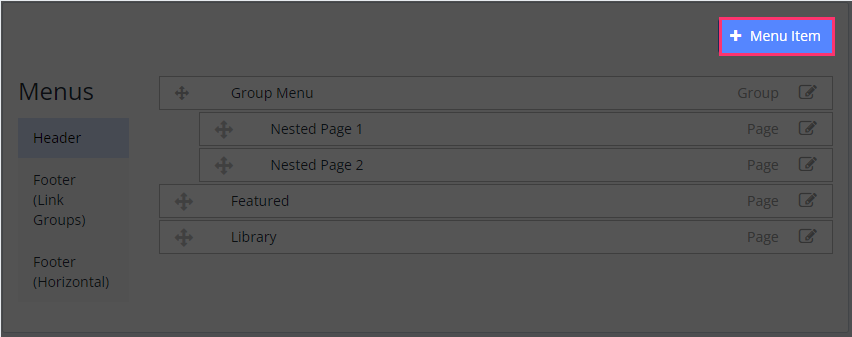
Adding a Group
- Click +Menu Item button
- In the Type drop-down, choose Group
- In the Label text field, enter a name for the new Group. (This is the title of the group displayed on the frontend)
- Click Reset to clear the text field to start over
- To add more items under the Group, repeat Step 5 until complete
- Click Save
- Go to the next section 'Organizing menu items under a group' to learn how to nest items for your group
- Edit the group again to enable it after you have nested one or more items under it.
- On the main menu dashboard, click Save to activate new changes
Organizing menu items under a group
Use the “move” cursor on the left of each menu item to grab-and-drag and move the items around.
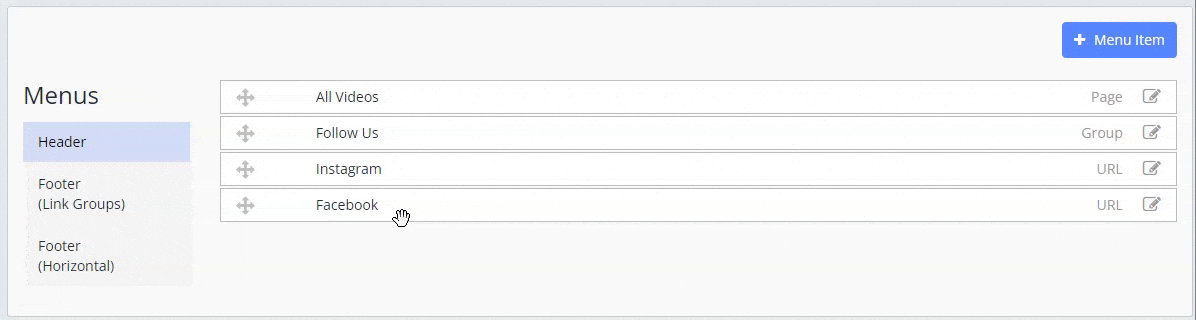
When you first create a Group, you'll notice there are no menu items under it, use the move cursor to grab-and-drag menu items into the group.
- When you move a Group, all menu items in the group will move with it
- Your unable to embed a group within another group
- A page or URL menu item can be moved from one group to another.
Organizing Menu Items
Use the “move” cursor on the left of each menu item to grab-and-drag and move the items around.

Here are some general rules about moving menu items:
- Menu items that are listed from top-down in the back end configuration screen will appear left-to-right in its related front end menu, or top-down if in a group.
- When you first create a Group, you'll notice there are no menu items under it, use the move cursor to grab-and-drag menu items into the group.
- When you move a Group, all menu items in the group will move with it
- Your unable to embed a group within another group
- A page or URL menu item can be moved from one group to another
- Always save your changes on the main Menu dashboard to see those changes on the front end
Enable, Disable or Remove
Each menu item has its own Edit button to make changes.
- Click the Edit button
- Make the desired changes (see Adding a Menu Item)
- Click Save
- On the main Menu dashboard, click Save to activate new changes
Enable/Disable
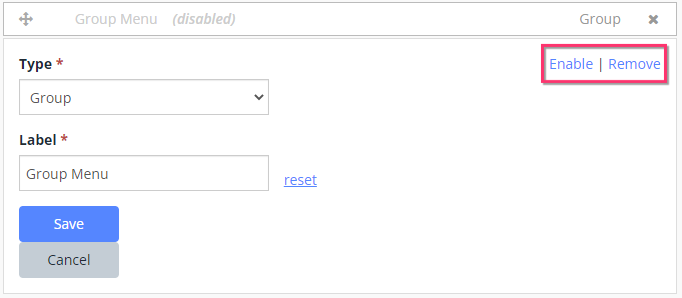
- To enable a menu item, click the Enable link on the right hand side
- Once Enabled the button will change to Disabled
- Toggle between enable and disable at any time and at your discretion
- On the main Menu dashboard, click Save to activate new changes
Remove
Deleting a group that has nested menu items will also delete those items.
- Find the menu item that you want to remove
- Click the Remove button on the menu item you wish to delete
As an added security measure a verification message will appear confirm the Deletion of a item or Cancel the deletion if you change your mind.

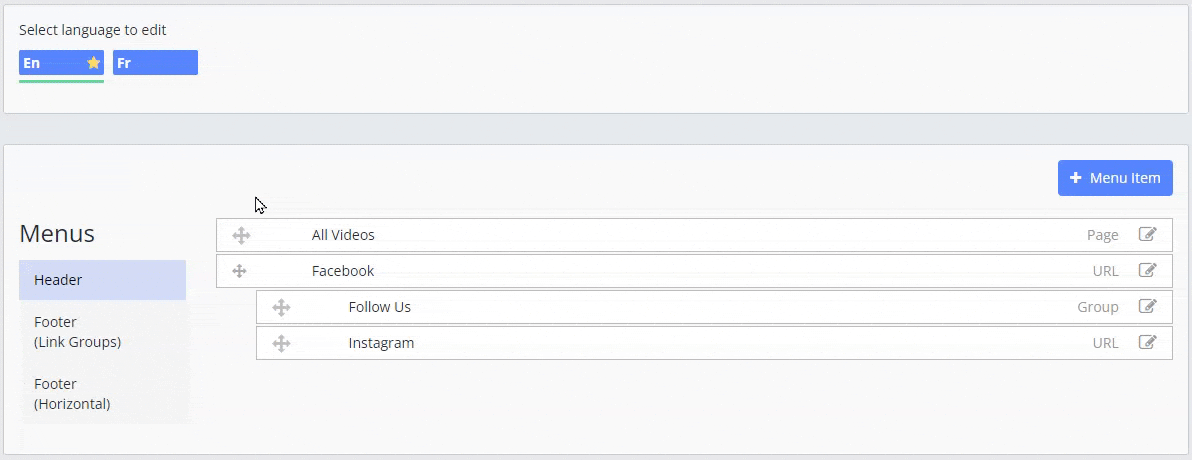
Adding Multi-Language Menus
If you have the Multi-Language feature, viewers can switch between different languages on your platform. You can set up separate menus for each language that has been added to your Vidflex video site. For example, if a viewer were to view your site in French, they can use the menu to access only the pages that are available in French.
To configure the French menus, toggle to the language tab to edit. The tab with the green underline is the active language being worked on.
The French menus use the same steps as the menus to create and organize menu items.