Managing a Live Event {full version}
Who can use this feature
All Admin Roles
Supported features: Live Events
Introduction
The Vidflex™ custom RTMP live process is built on the strength of the Amazon Web Services cloud infrastructure, providing more robust scalability, reduced latency and additional streaming reliability.
In this article you will learn how to schedule a new live event and connect a live stream encoder to deliver your content to your Vidflex™ site.
If you want to read the shorter version (useful for Live Event Operators after they understand the full version) to recount the steps quickly visit: Managing a Live Event {short version} →
Video Tutorial
Opening the Library
- Log into your admin account
- Go to Library under Channel Settings

Schedule Live Event
- At the top of the Library screen toggle to Live Event
- Click the Schedule Event button in the top right corner of the screen
- In the pop-up window, type in the name of the event
- To continue, click Schedule Event
- The next screen takes you to the Live Event containers Event tab > Date & Time submenu

Setting Date & Time
Each event requires to set a date and time before moving on to the next steps.
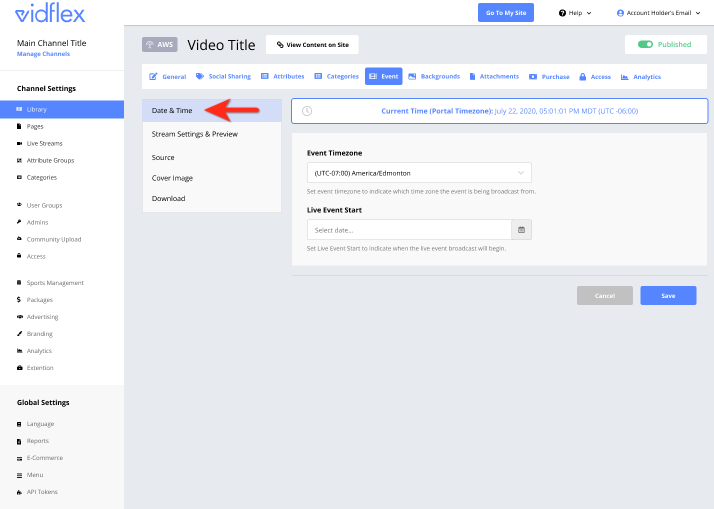
Choose a date & time
- The Event Timezone will use your sites default timezone that was setup during the onboarding process. To change it click its box and make a selection
The Live Event Start is when the live stream becomes viewable in the front end player for your audience. Click the icon and select a date and time for this event

- When ready, click Save.
A green banner at the top will appear to confirm this page has been saved


Before Your Event Starts
The sections below are to be completed well before the live event starts to make sure your event details and live stream encoder are working properly.
Stream Settings & Preview
The Stream Settings & Preview submenu is where you will configure the stream settings for this event, start the input, retrieve encoder settings, and monitor the live stream in the preview player.

- Read First -
Follow the steps in order:
Other items to be aware of:
- Changes will be saved & locked after clicking on the Activate Stream button as the final step
- Encoder settings will appear after the input has been started and is in the Ready state
Let's begin...
[1] DVR Settings
DVR Enabled: When enabled, DVR allows viewers to watch the live event after the broadcast has ended.
Once the input starts the DVR Setting cannot be changed
The default setting is DVR Enabled. This will record your event.
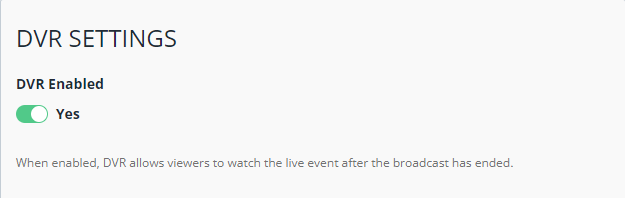
If you don't want your event recorded. Switch this toggle to no.

[2] Transcoder Settings
Configure the transcoder settings to set the quality of your live stream.

(1) Resolution
Select the resolution of the source video for the live event.
- Determine what the output bitrate is going to be in your live stream encoder for this event. We recommend setting the encoder bitrate to one of the following:
- 1280x720 @ 3000Kbps, or
- 1920x1080 @ 3500Kbps
- Click on the Resolution field and select 1280 x 720 (720p) or 1920 x 1080 (1080p) in the drop down. Make sure this matches what you set in your live stream encoder
- With this selection made, you're ready to choose a matching transcode profile in the next step
(2) Transcode Profile
Select which quality profile the transcoder should use.
Click on the Transcode field and choose either 720 Single, 720 Full or 1080 Single, 1080 Full, based on what you chose in the previous step
To access Full transcode settings, please contact Sales and ask about "Cloud Transcoding"
- With this selection made, you're ready to choose a region in the next step
(3) Region
Select the region closest to your live event encoder.
- Click on the Region field and make a selection for:
- West if you're in the western part of North America
- East if you're in the eastern part of North America
- With this selection made, you're ready to move on to the next section [3] Preview
If you chose the wrong region the latency may be delayed longer for the first time starting a live stream from the current venue
[3] Preview
Starting the stream on the Preview section ready's the Vidflex™ system to receive the video from your live stream encoder.
The preview player only shows the live stream while its live. If DVR is enabled it can be played back in the DVR submenu when the stream is over.
If you have not configured step [1] DVR Settings, and step [2] Transcoder Setting, complete those first.
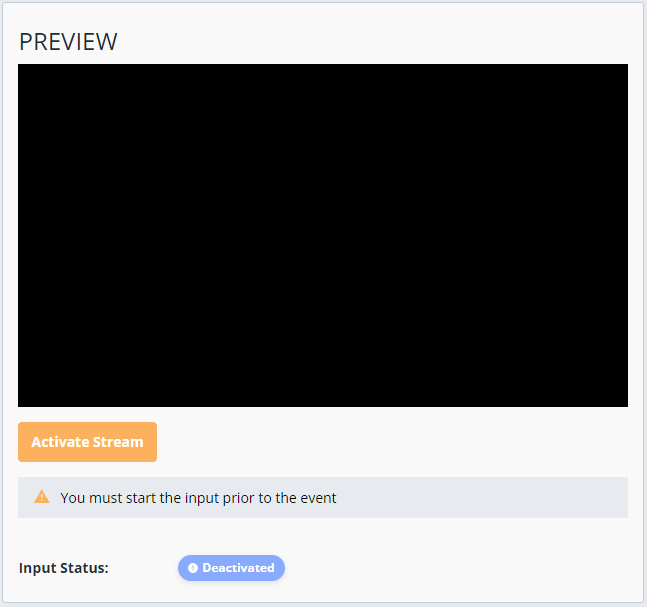
Starting the Input
Click Activate Stream button to ready the system. A spinning indicator will show while the system is firing up, and the DVR & Transcoder Settings will be greyed out
The first time starting the input for an event can take up to 5 minutes. Each time after will take up to 2 minutes

- When the system has started, the Input Status display will change from "Deactivated" to "Activating", and the Enable Stream button will now say "Disable Stream"
A banner will appear above the "Current Time" display saying, "Live event is start soon. Manage it now". Click the link to come back to the Stream Settings & Preview screen when navigating on any of the Event submenus.

- Encoder settings are now available in the Encoder Settings section


[4] Encoder Settings
The settings in this section are to be copied into your live stream encoder.
Make sure to click the copy to clipboard icon to copy the Stream URL and Stream Key settings

When setting up the custom RTMP server in your live stream encoder to add the settings from this section, it may have different labels or terms then what's shown on Vidflex™.
For example, Stream URL may say "RTMP URL" or "Server", and Stream Key may just say "Stream" or "Stream ID". Essentially, If you see two input fields use the Separate format, and if you see one input field use the Combine format.
The screenshot below was taken from inside the OBS encoder. It's showing the encoders settings that were copied from a Vidflex™ event.

Review the recommended bitrate and resolution to see if it matches what you entered into your live stream encoder output settings for the best live stream experience.
If you need help determining the best bitrate for your live stream check out our Live Stream Requirements article
Testing & Disabling the Stream
You can go live right now. We recommend doing a test stream at least an hour before the Live Event Start time. If you're event is going live now you can skip to the Going Live section below.
Start Test Stream
With the Vidflex™ system ready, you can now start the stream from your live stream encoder.
- Start the stream from your live stream encoder
- On Vidflex, click the play button on the preview player window
- Wait for your stream to show in the preview player in approximately 15 seconds
- Compare the Vidflex preview player to the live stream encoders live output player
When the test stream is done, press Disable Stream
If your event is about to begin, leave your live stream encoder and Vidflex™ system running and skip to the Going Live section below
- Now you can shut off your live stream encoder until a minimum of 10 minutes before your Live Event Start time begins, which is best practice
Disabling The Stream
Disabling the stream temporarily shuts down the Vidflex™ system from running for this event. You should disable the stream when there's a long break in between the test stream and the actual live event.
For example, a break that is longer than an hour calls for disabling the stream.
Actions:
Click Disable Stream to pause the Vidflex system for this event
This action allows you to make changes to Resolution and Transcode Profile settings if needed
- The Input Status display will change to "Disabled"
- The Event Start section will be greyed out until the input is turned back on
- Click Enable Stream to fire up the Vidflex system again and continue streaming
Changing the Event Start Time
This section allows you to quickly change the Live Event Start time, or choose to override it and " Go Live Now".

How to adjust the "Live Event Start" time
Follow the steps below if you need to change the Live Event Start time before or during your event follow the steps below.
- Click on the date and time field, or click on the calendar icon to open it up
- Select a new date and time
- Click anywhere outside of the calendar widget to save the new time
How to "Go Live Now"
Follow the steps below if you need to start your event immediately and its before the set Live Event Start time.
- Click on the Go Live Now button
A pop up window will appear on your screen. Read the message carefully before clicking yes or no
The change may take up to 60 seconds to update for viewers currently waiting for the event to start
- If you choose to go live now click Yes, otherwise click no to cancel this action
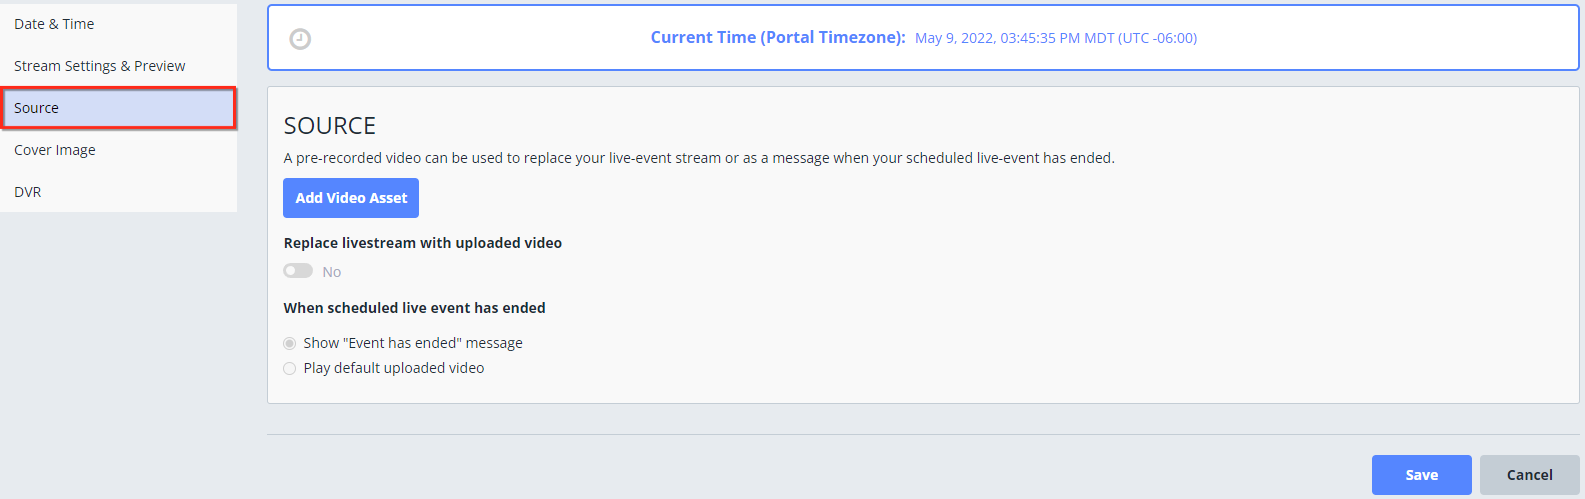
Replacing the Live Event Source
After a DVR-enabled live event has been broadcast, you may want to replace the DVR recording with another video file. Alternatively, you might download the recorded live event, edit its content, and then replace the original recording with the edited version. You also have the option to download the edited version of the event.
Click Source in the left sidebar submenu. By default, the video source is the live event stream. You can’t select the Uploaded video asset option until you’ve added a video file and that video file is in the "Success" state
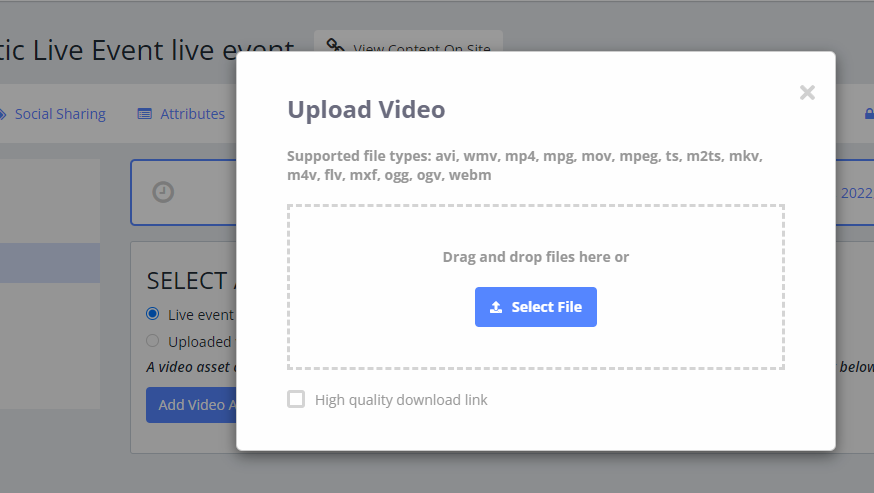
- To add a video file, click Add Video Asset
- To create a high quality downloadable MP4 file, check the box for 'High quality download link'
- In the Upload Video window that appears, you can either:
- Drag-and-drop the file into the window, OR
Click the Select File. Browse to and select the video file, then click Open
After the file is uploaded, the Upload Video window automatically closes. Depending on the size of the video file, it may take some time for the video to be encoded. You can navigate away from this screen and then return to the screen later to check on the status.
- After the video file has been encoded, its status updates to "Success". To replace the live event with the video file, select Uploaded video asset
To preview the video file, click Preview
 You can only preview the uploaded video asset in this screen. You won't be able to see this in the Stream Settings & Preview tab
- You can also add multiple video files (see Steps 2 and 3 above) and then choose which file will be used to replace the live event source. Click the file's arrow button and choose Set Default.
- The original DVR recording will not be deleted
- You can revert the live event source back to the original DVR recording by selecting the Live event stream as the video source
- At any time, you can toggle between the Live event stream or the Uploaded video asset options
- When Replace livestream with uploaded video is enabled, choose what you want the front end video player to show after the event has ended:
- Show Event has ended message
- Play default uploaded video
- Click Save if any changes were made


Adding a Cover Image
You can add a cover image for a live event. This is a static cover image that displays on the video player when the live event isn’t being played.
- In the Event tab, click Cover Image in the left sidebar.
- Click Choose File.
- In the window that opens, browse to and select the desired image file, then click
- Supported file types include PNG, JPG, and JPEG.
The recommended image size is 1280 × 720.
A progress bar appears to indicate the image is being uploaded. A preview of the image is displayed.
- If you want to use a different cover image, click Delete Image to delete the existing image, and then upload another image.
Going Live
Before the Live Event Start time begins make sure that you've started the Vidflex™ input and are already streaming to this event. We recommend streaming at least 10 minutes prior to the event start.

When the Live Event Start Time begins, a green banner will appear above the "Current Time" display on all of the Event submenus screens.
When navigating on any of the Event submenus, click the " Manage it" now link to be brought back to the Stream Settings & Preview submenu screen.
Monitor the Stream
Your only role now is to monitor the live stream to make sure the picture quality in the Vidflex™ preview player matches what you see in your encoder player window.
If you haven't already, press the play button inside the preview player to view your live stream.
Ending the Event
Once you're satisfied that the event is over, follow the steps below to end it.
Do not end the event for test streams. You cannot stream to this event again after ending it
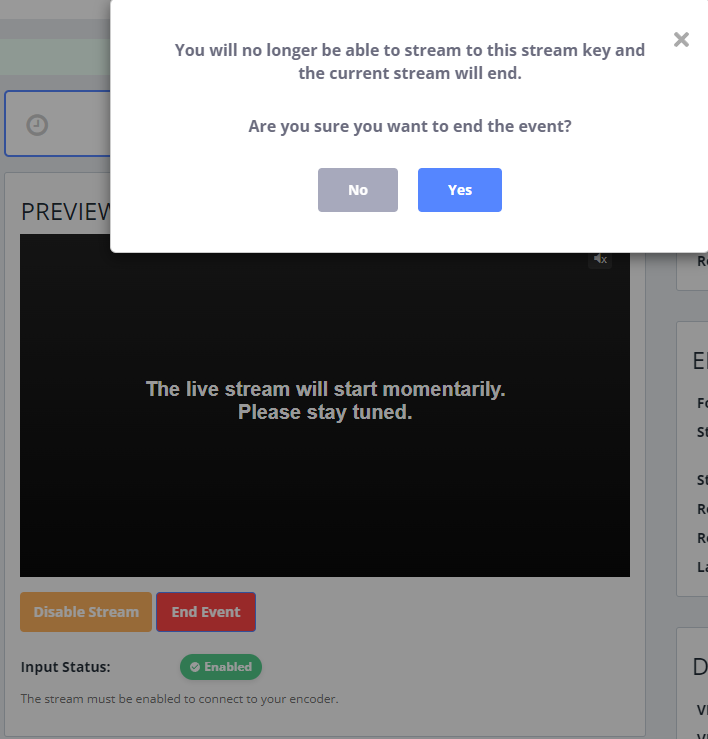
- When your event is over simply click the End Event button under the preview player
- Read the message carefully before confirming
- Press No or Yes to confirm
- The event is now over and the Vidflex system will automatically disable the stream
- You can now shut off your live stream encoder
- If DVR was enabled, you can watch the event recording in the DVR submenu
After the event has ended the preview player will display the message "The event has ended". The box to the right of the player now notifies the admin that the video is available for trimming. Learn more in the next topic below.

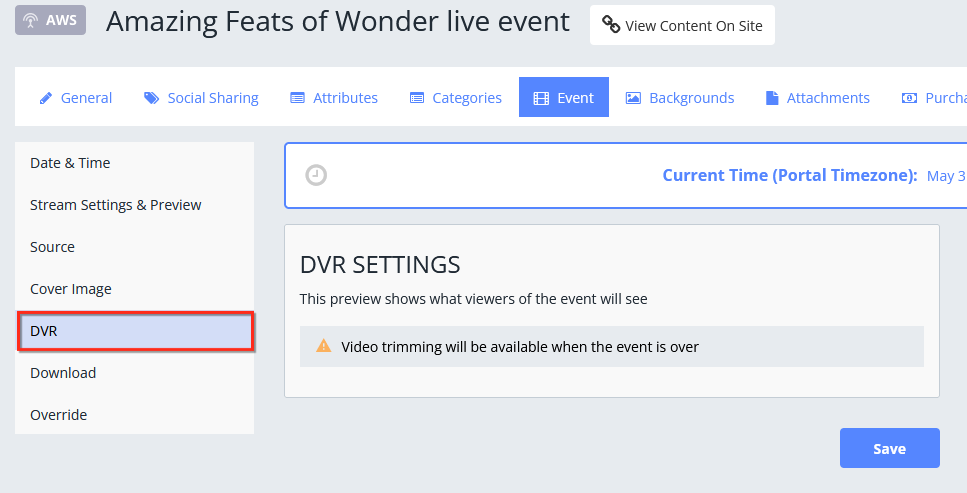
DVR
The DVR player and trimming feature are available to use after an event is over. Refer to the previous section on how to end events.
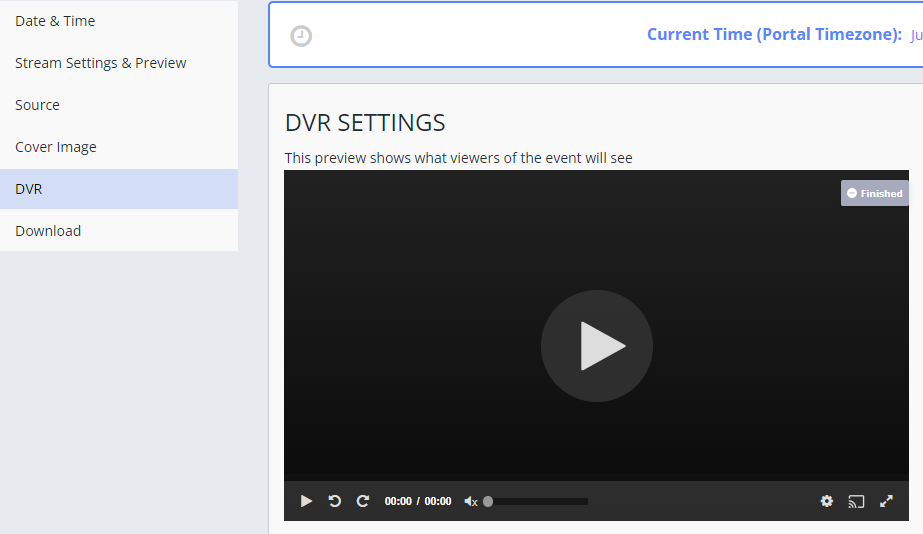
DVR Player
The DVR player is where you can review the recorded stream and make trimming adjustments to the beginning and end of the stream. Unlike the front end player that only shows content between the event start and end time, the DVR player will show everything from the time the live stream encoder first started streaming until it's been shut off.
Simply click the play button to start watching the recorded stream.
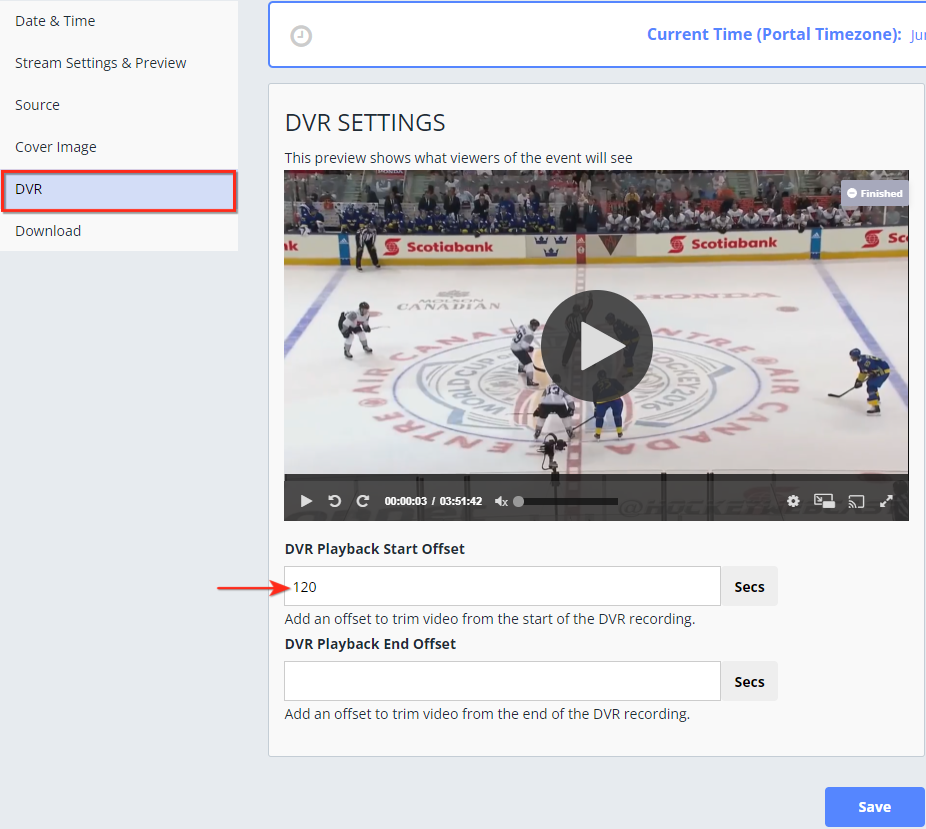
Video Trimming
If there’s content at the beginning or end of the DVR archive that you don’t want showing on the front end player and generated download mp4, it can be trimmed. If no trimming is required skip to creating a download if you need to make one.
Trimmed content hides it from the DVR player and front end player view, but does not delete it
Video is available for trimming for 2 days of the original stream and only up to 24 hours can be trimmed. After 2 days, any content outside the start and end times will get permanently deleted.
- Go to DVR submenu
- Offset the start or end field by entering the time in seconds
- For example. to trim off 2 minutes from the start enter the value ‘120’ without the quotes
- You can offset both the start offset and end offset, or just one
- When ready, click Save
- Repeat steps 2 & 3 as many times as needed to get the right trimming
Help with Trimming Formula
Use the formula below to get the value of seconds to off set the start or end of the stream. This calculation is helpful if there's lots of black screen at the end of your stream from forgetting to End Event after it finished, or from not having an active stream running when the event start began.
Formula: (hours x 60 + minutes) x 60 + seconds
- Convert total duration (original stream) to seconds = (hours x 60 + minutes) x 60 + seconds
- Convert time where black video starts to seconds using same formula
- In our example the black screen starts after the event actually ended at 2:05:30
- Using the same calculation the total seconds = 7530
- Subtract total duration - time where black video starts
- 20227 - 7530 = 12697
- Enter the value you get into the DVR Playback End Offset field
- Click Save
- Verify in DVR player if trimmed content looks correct
- Repeat if necessary
Below is a mock example of what the trimming formula looks like in action.
In our example we have a stream with a total duration of 5:37:07 due to forgetting to end the event when it finished. What was actually streamed was 2:05:30. We want to know the amount of seconds to offset the end of the stream because that's when the black screen starts in this example.
- Calculate the values inside the brackets of the total duration first (5:37:07)
- (hours x 60 + minutes) is (5 x 60 + 37) = 337
- Then calculate the next part of the formula: (new value) x 60 + seconds = 337 x 60 + 7 = 20227 seconds
- Run the same calculation for the what was actually streamed up until the black screen first starts (2:05:30)
- (2 x 60 + 5) x 60 = 30 = 7530 seconds
- Subtract 20227 - 7530 = 12697 seconds
- Enter 12697 into the DVR Playback End Offset field
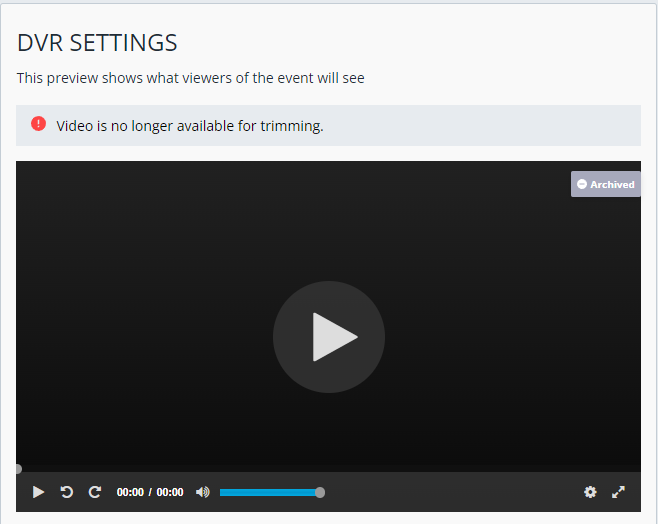
Video is no longer available for trimming
After 2 days from the original stream has passed the trimming controls will disappear below the player, and a message will appear above the player saying "Video is no longer available for trimming."
Create MP4 Download
The create button will unlock only after the event has ended. If the input is still running and the event start time has already passed click the End Event button
- When you’re sure the event has been properly ended go to the Download submenu
- The generated mp4 will only use content between the start and end time. If you need to make any trimming adjustments to the video, do so in the DVR submenu in the previous section
When ready, Create

- Wait for the download to finish creating. Wait times are generally half the length of the stream
- For e.g. 1 hour of streamed content between the start and end times will take approximately 30 minutes to generate an mp4 file
- When mp4 is ready, click Download
